Sensing Place

Last September probably the most exciting (and exhausting) thing that has ever happened to me took place. Ang Truscott and Debs White from Fibre Arts Take Two and Gary Weston from Sphagetti Weston came to the studio to film an online workshop. The result is Sensing Place, and it is coming out in the next couple of weeks. The workshop covers many of the things that I do within my own practice, and it centres on experiencing the world around us using the senses of sight, sound and touch.

I have titled the workshop Sensing Place because I love how the two words, sense and place, can have a different meaning depending on how they are put together. Sensing Place, puts the emphasis on the word sense which is the way the body understands what’s going on around it. We are also going to be exploring our environment to understand a Sense of Place which is either the fundamental character of a place, or the meaning people give to it, or, perhaps more often, a mixture of both.

Sketchbook work with drawing, mark making and writing

The workshop is about your landscape, your perception of it using the senses of sight, sound and touch, your documentation of those perceptions and finally, your articulation of it through the things you make.

Make collage – both paper and cloth

In this workshop we investigate three of the five senses – the senses of sight, sound and touch. Although we understand and experience the world using all the senses simultaneously, I begin by presenting each sense to you individually (although you will find that it is just about impossible to do so and one the other senses will inevitably creep in). This is so that I can introduce ideas and techniques to you gradually. You will practice these, and then at the end of the workshop I ask you to put into practice everything that you have learned and start to make work that combines all the senses. You’ll start with the familiar sense of sight, go on to visualising sound and then we’ll consider touch. Finally, I will be asking you to see sound, hear space, hear movement, feel sound etc.

Draw sound

‘By sitting still and taking the time to look and to listen, to breathe, to think and to feel, I believe you can understand your surroundings more completely. By consciously observing and then writing and drawing about your experiences you are more able to comprehend the finer detail, the repetitions and rhythms, and the colours of the world around you.’ 
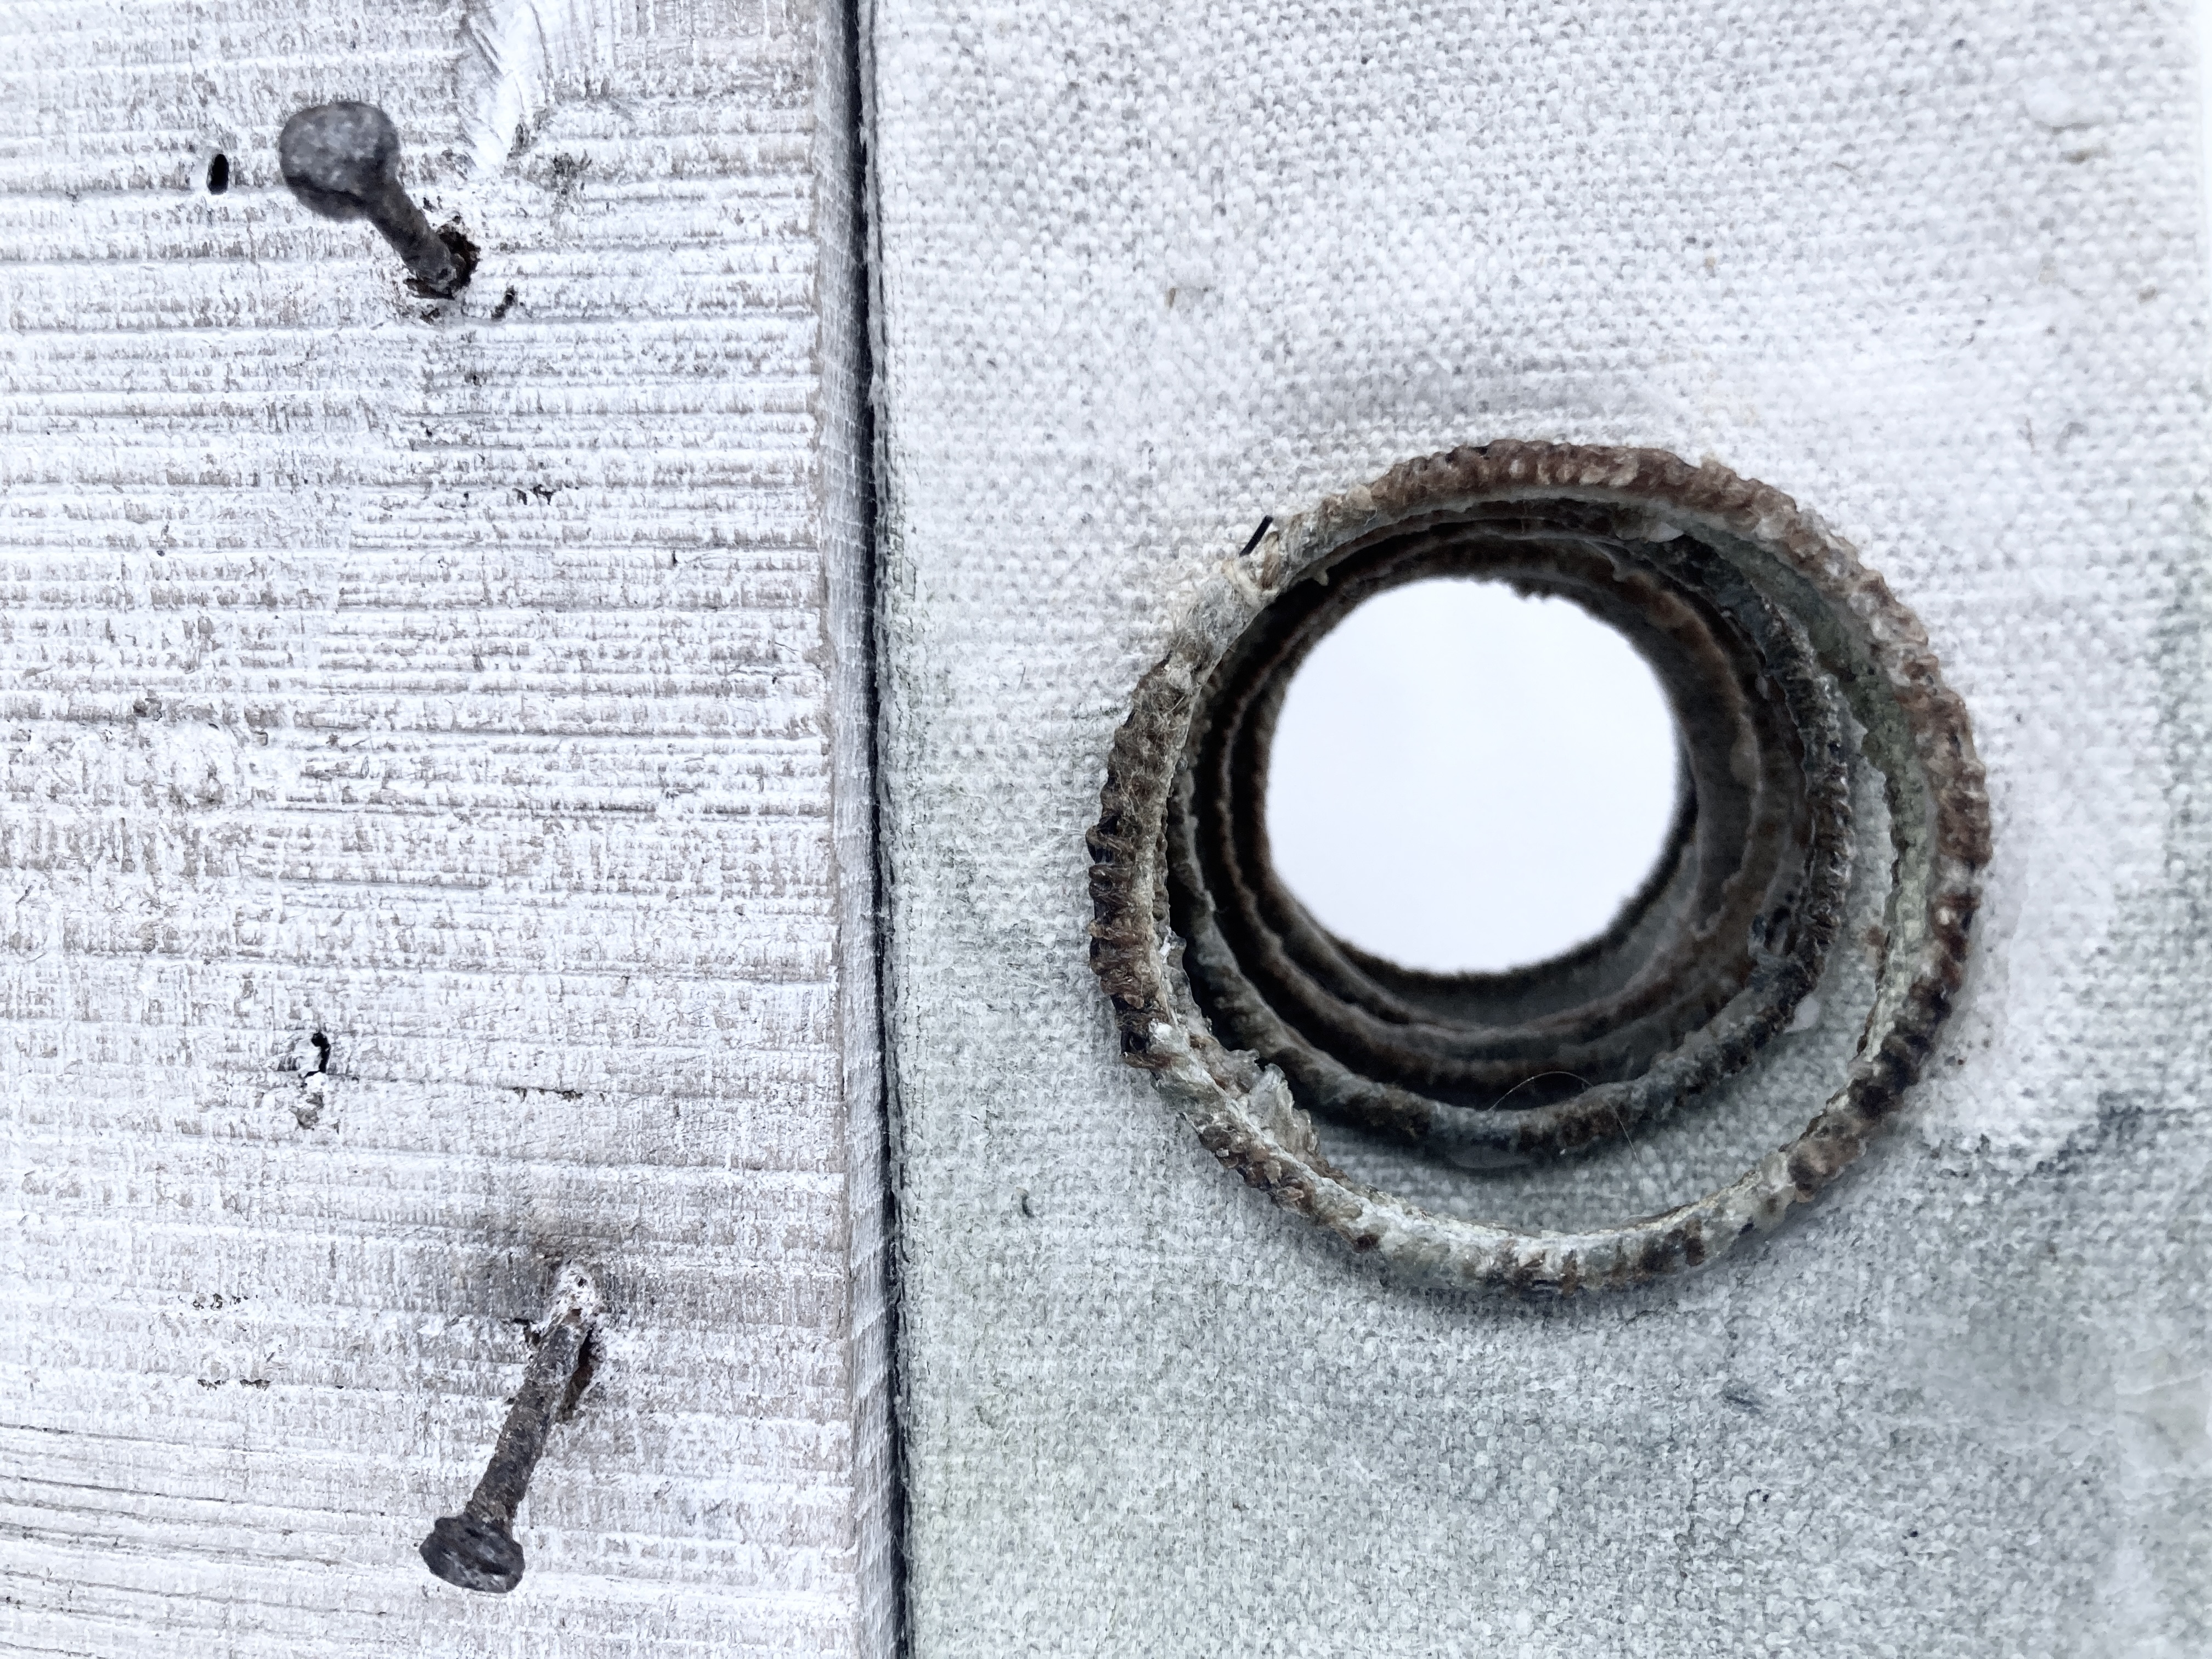
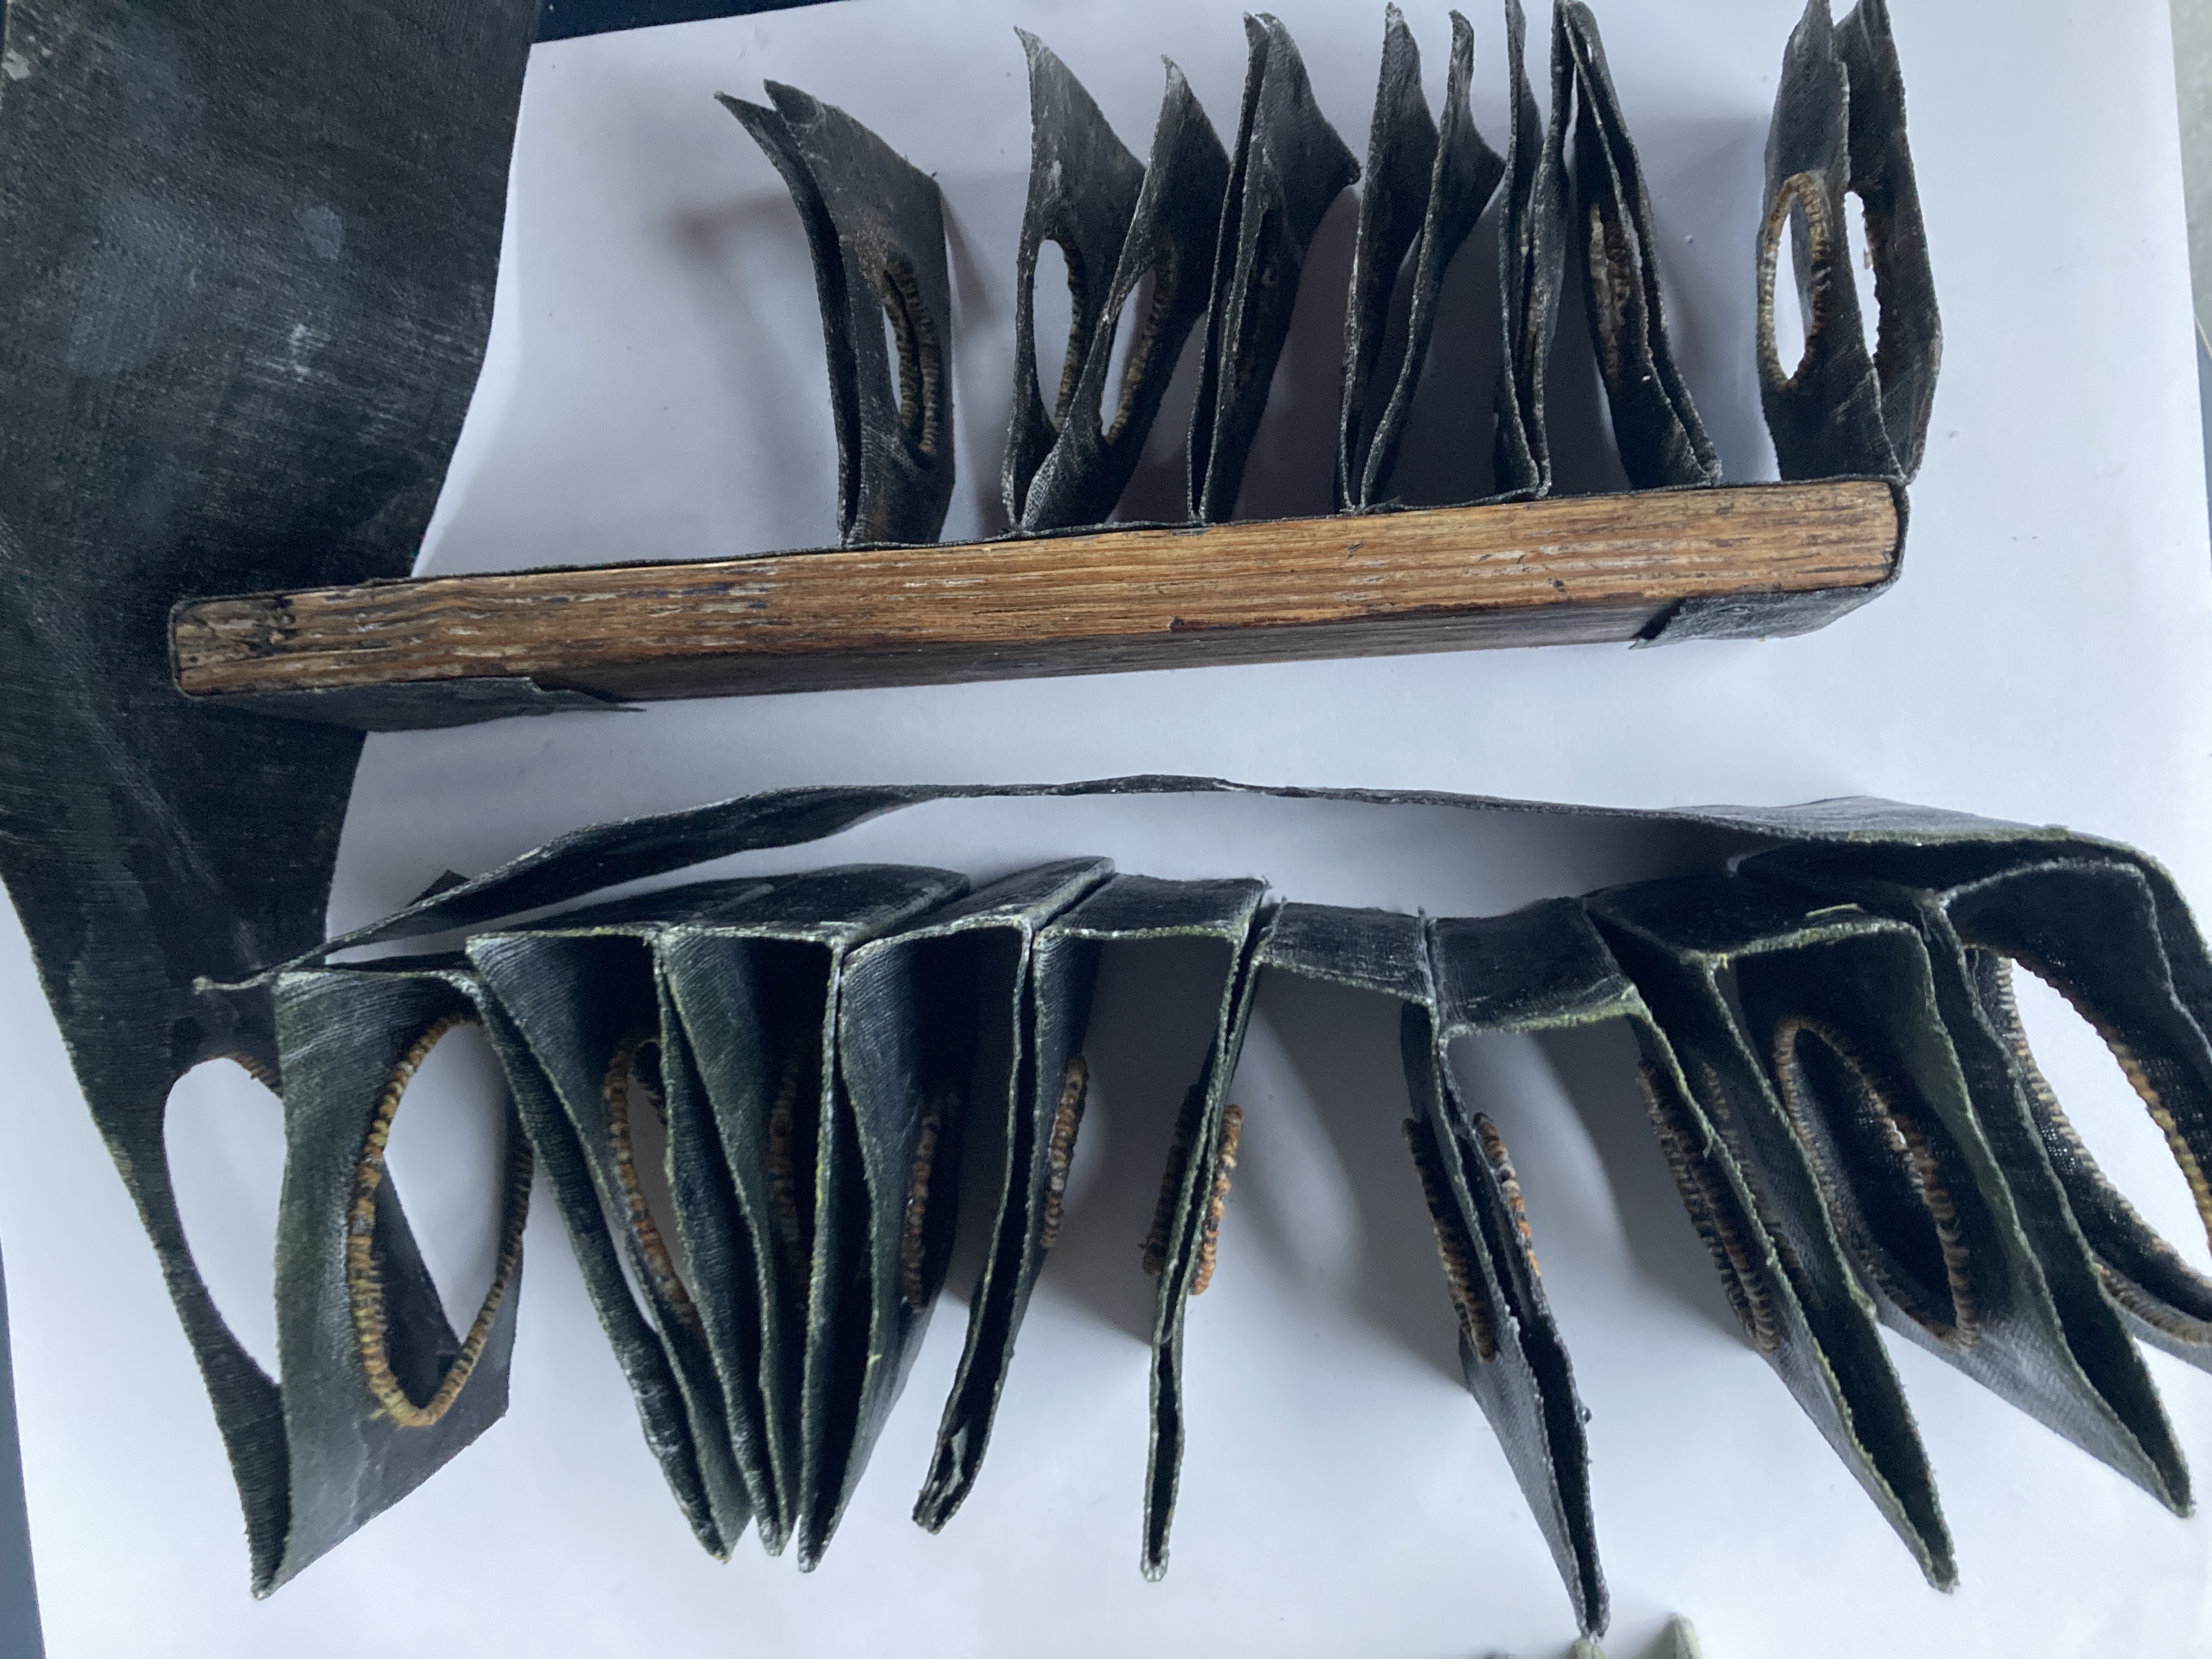
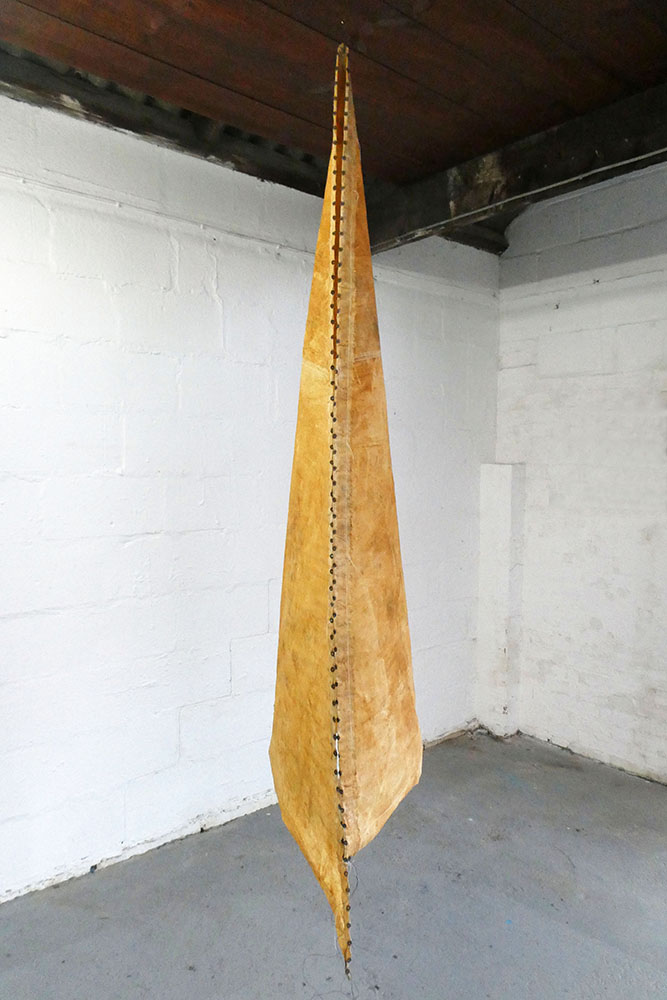
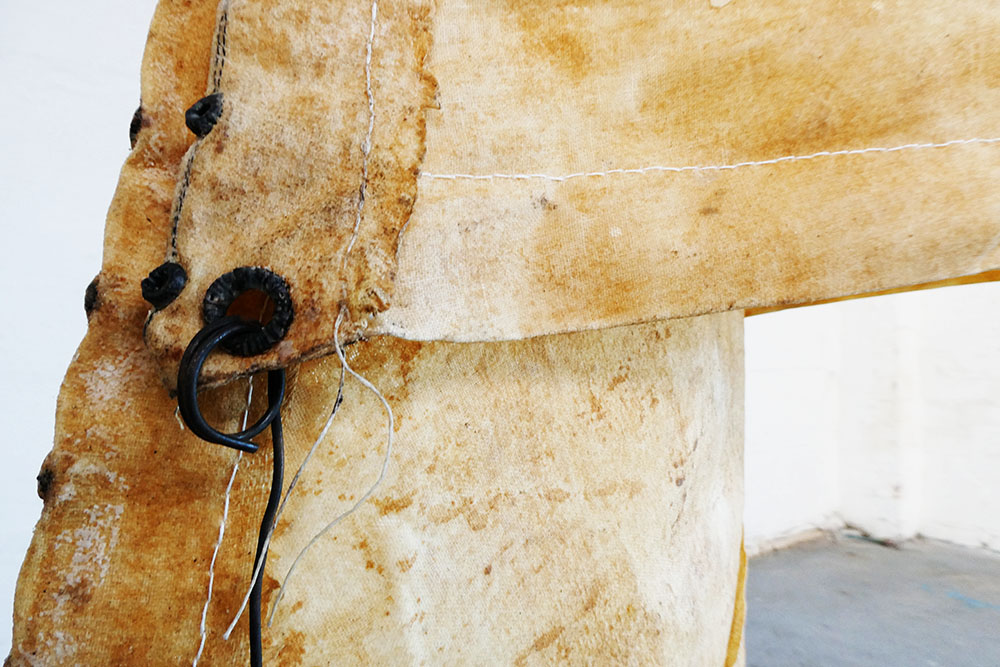
Make holes!

In order to experience your environment, I am asking you to go outside and take some walks. Walking around your ‘place’ is the best way of getting to know it. You will explore it on foot, wandering, and searching out experiences, but I am also going to ask you to sit still and take notice. You’ll sit and look, listen and feel what is going on around you. You’ll pay attention. You’ll notice. You’ll write and draw. And when you get home, I’ll help you to use your noticings to make artworks.
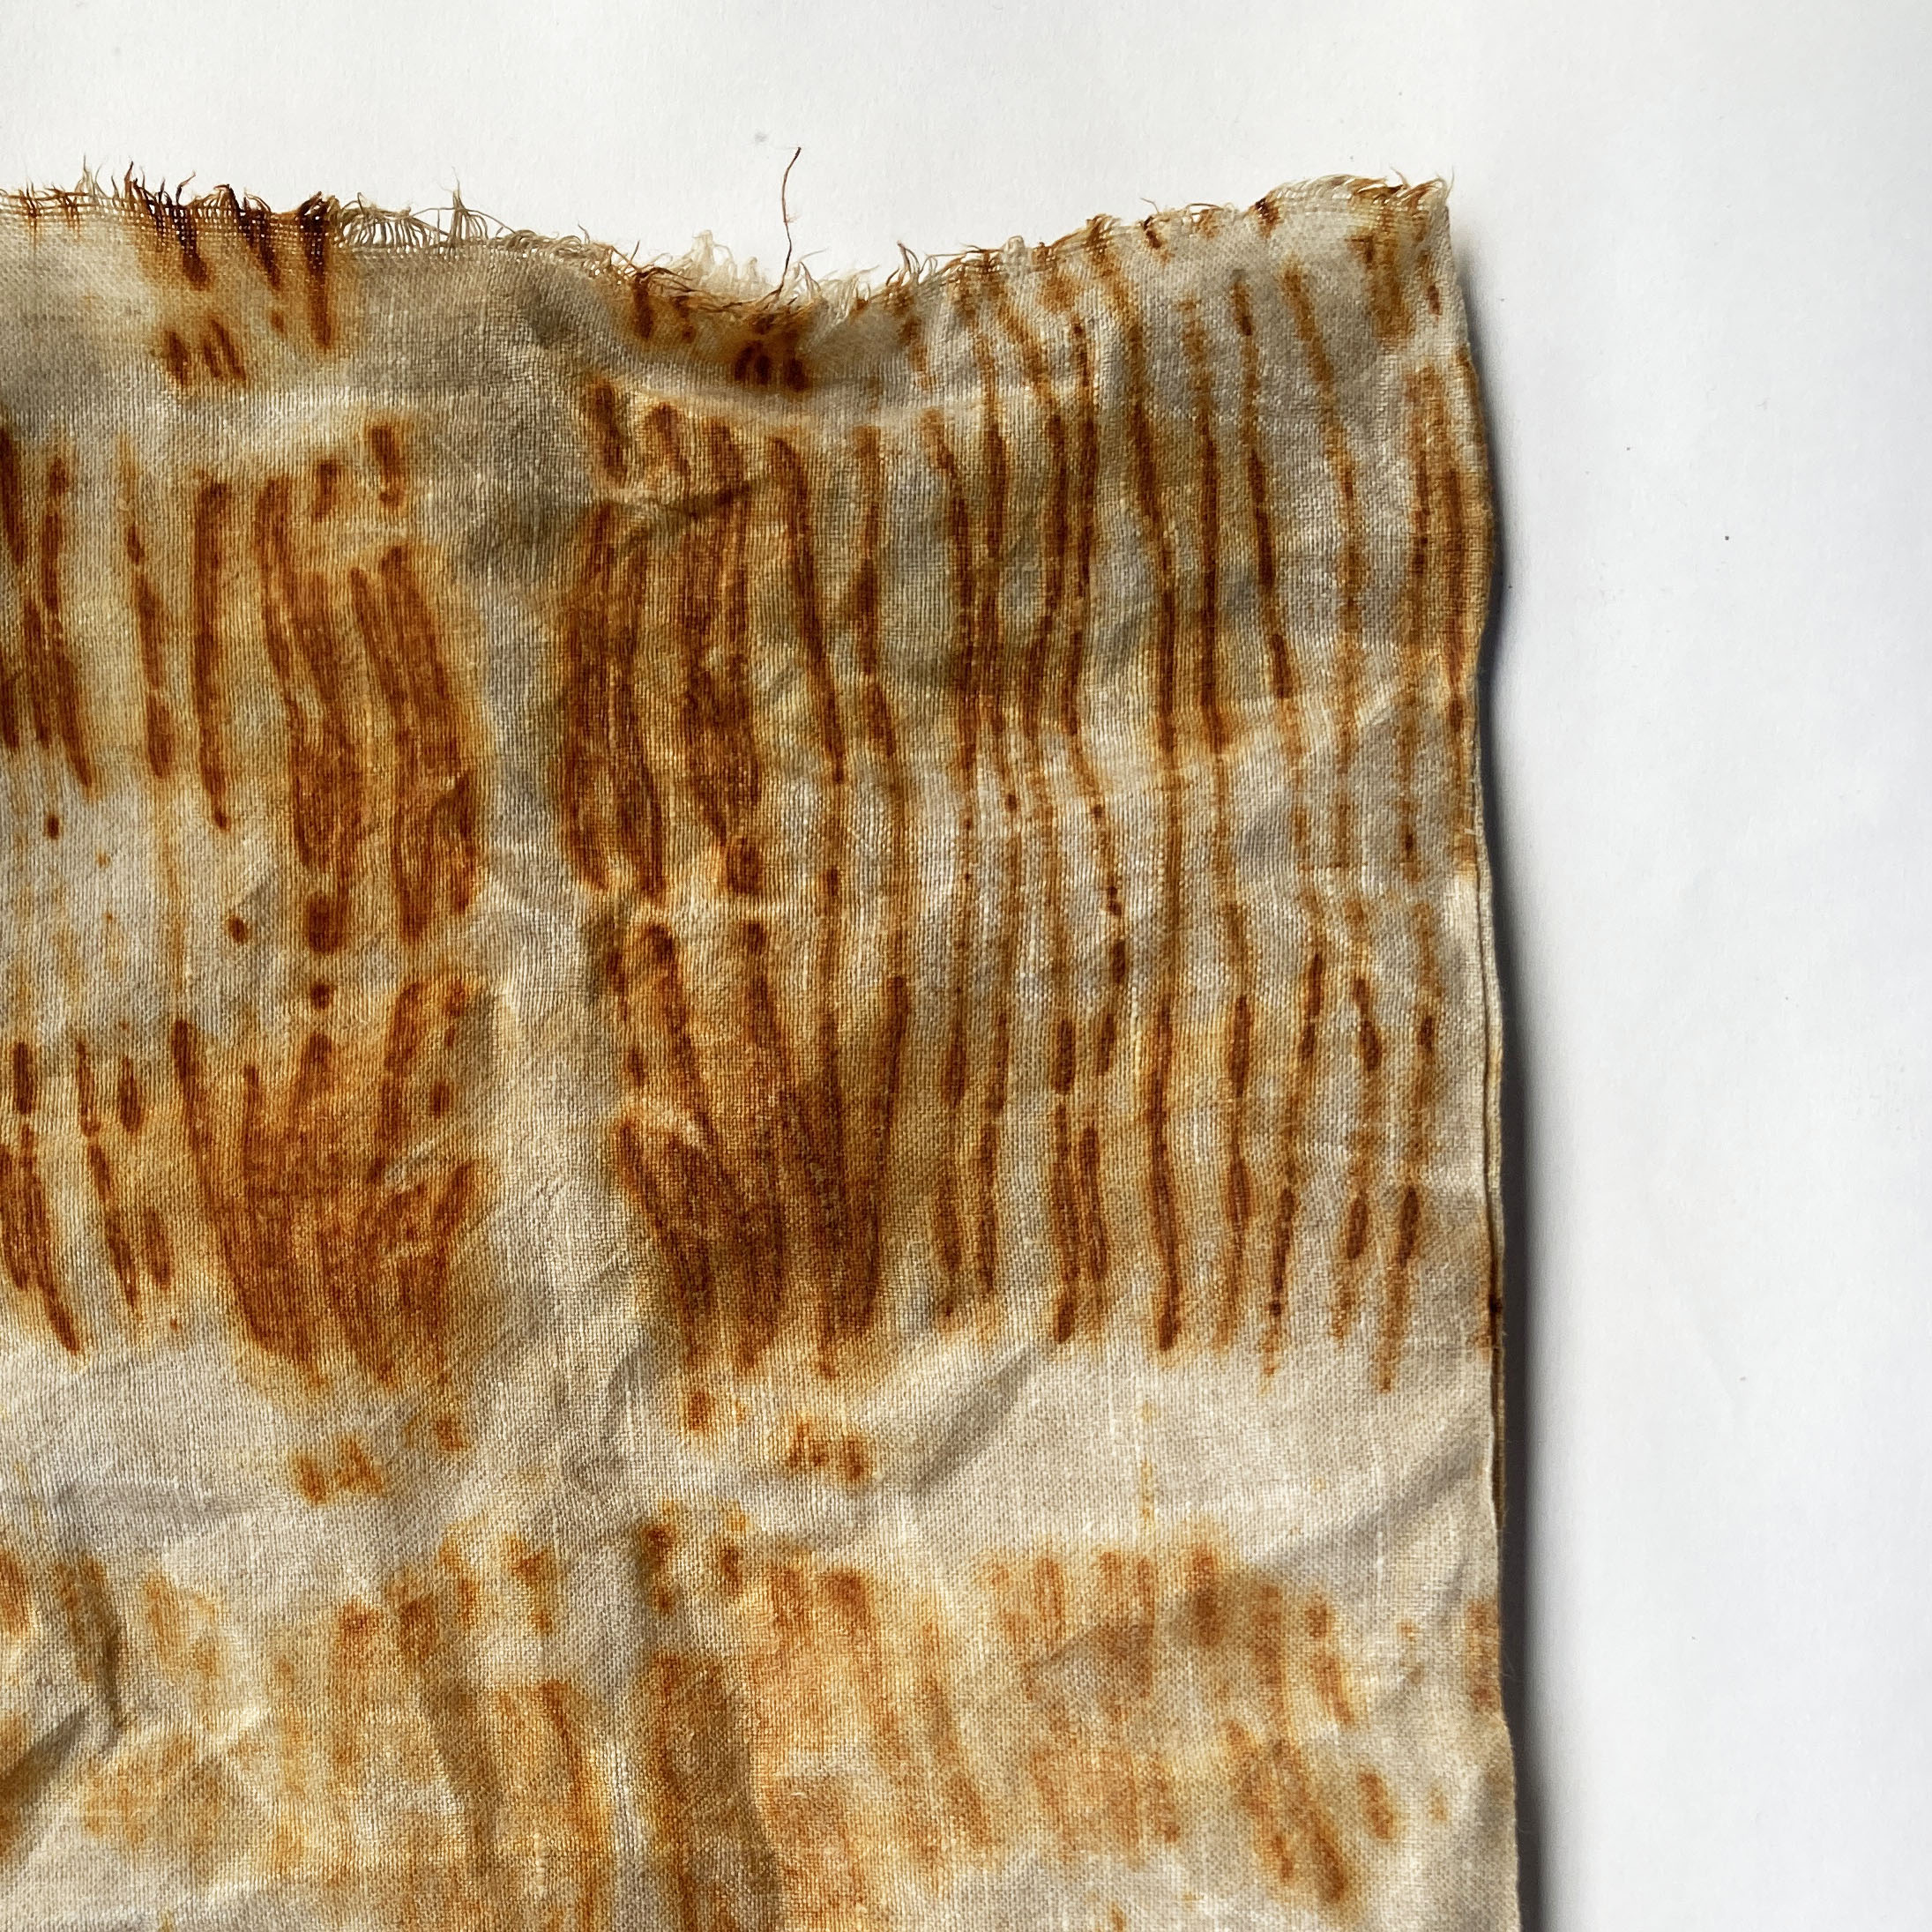
Mark cloth

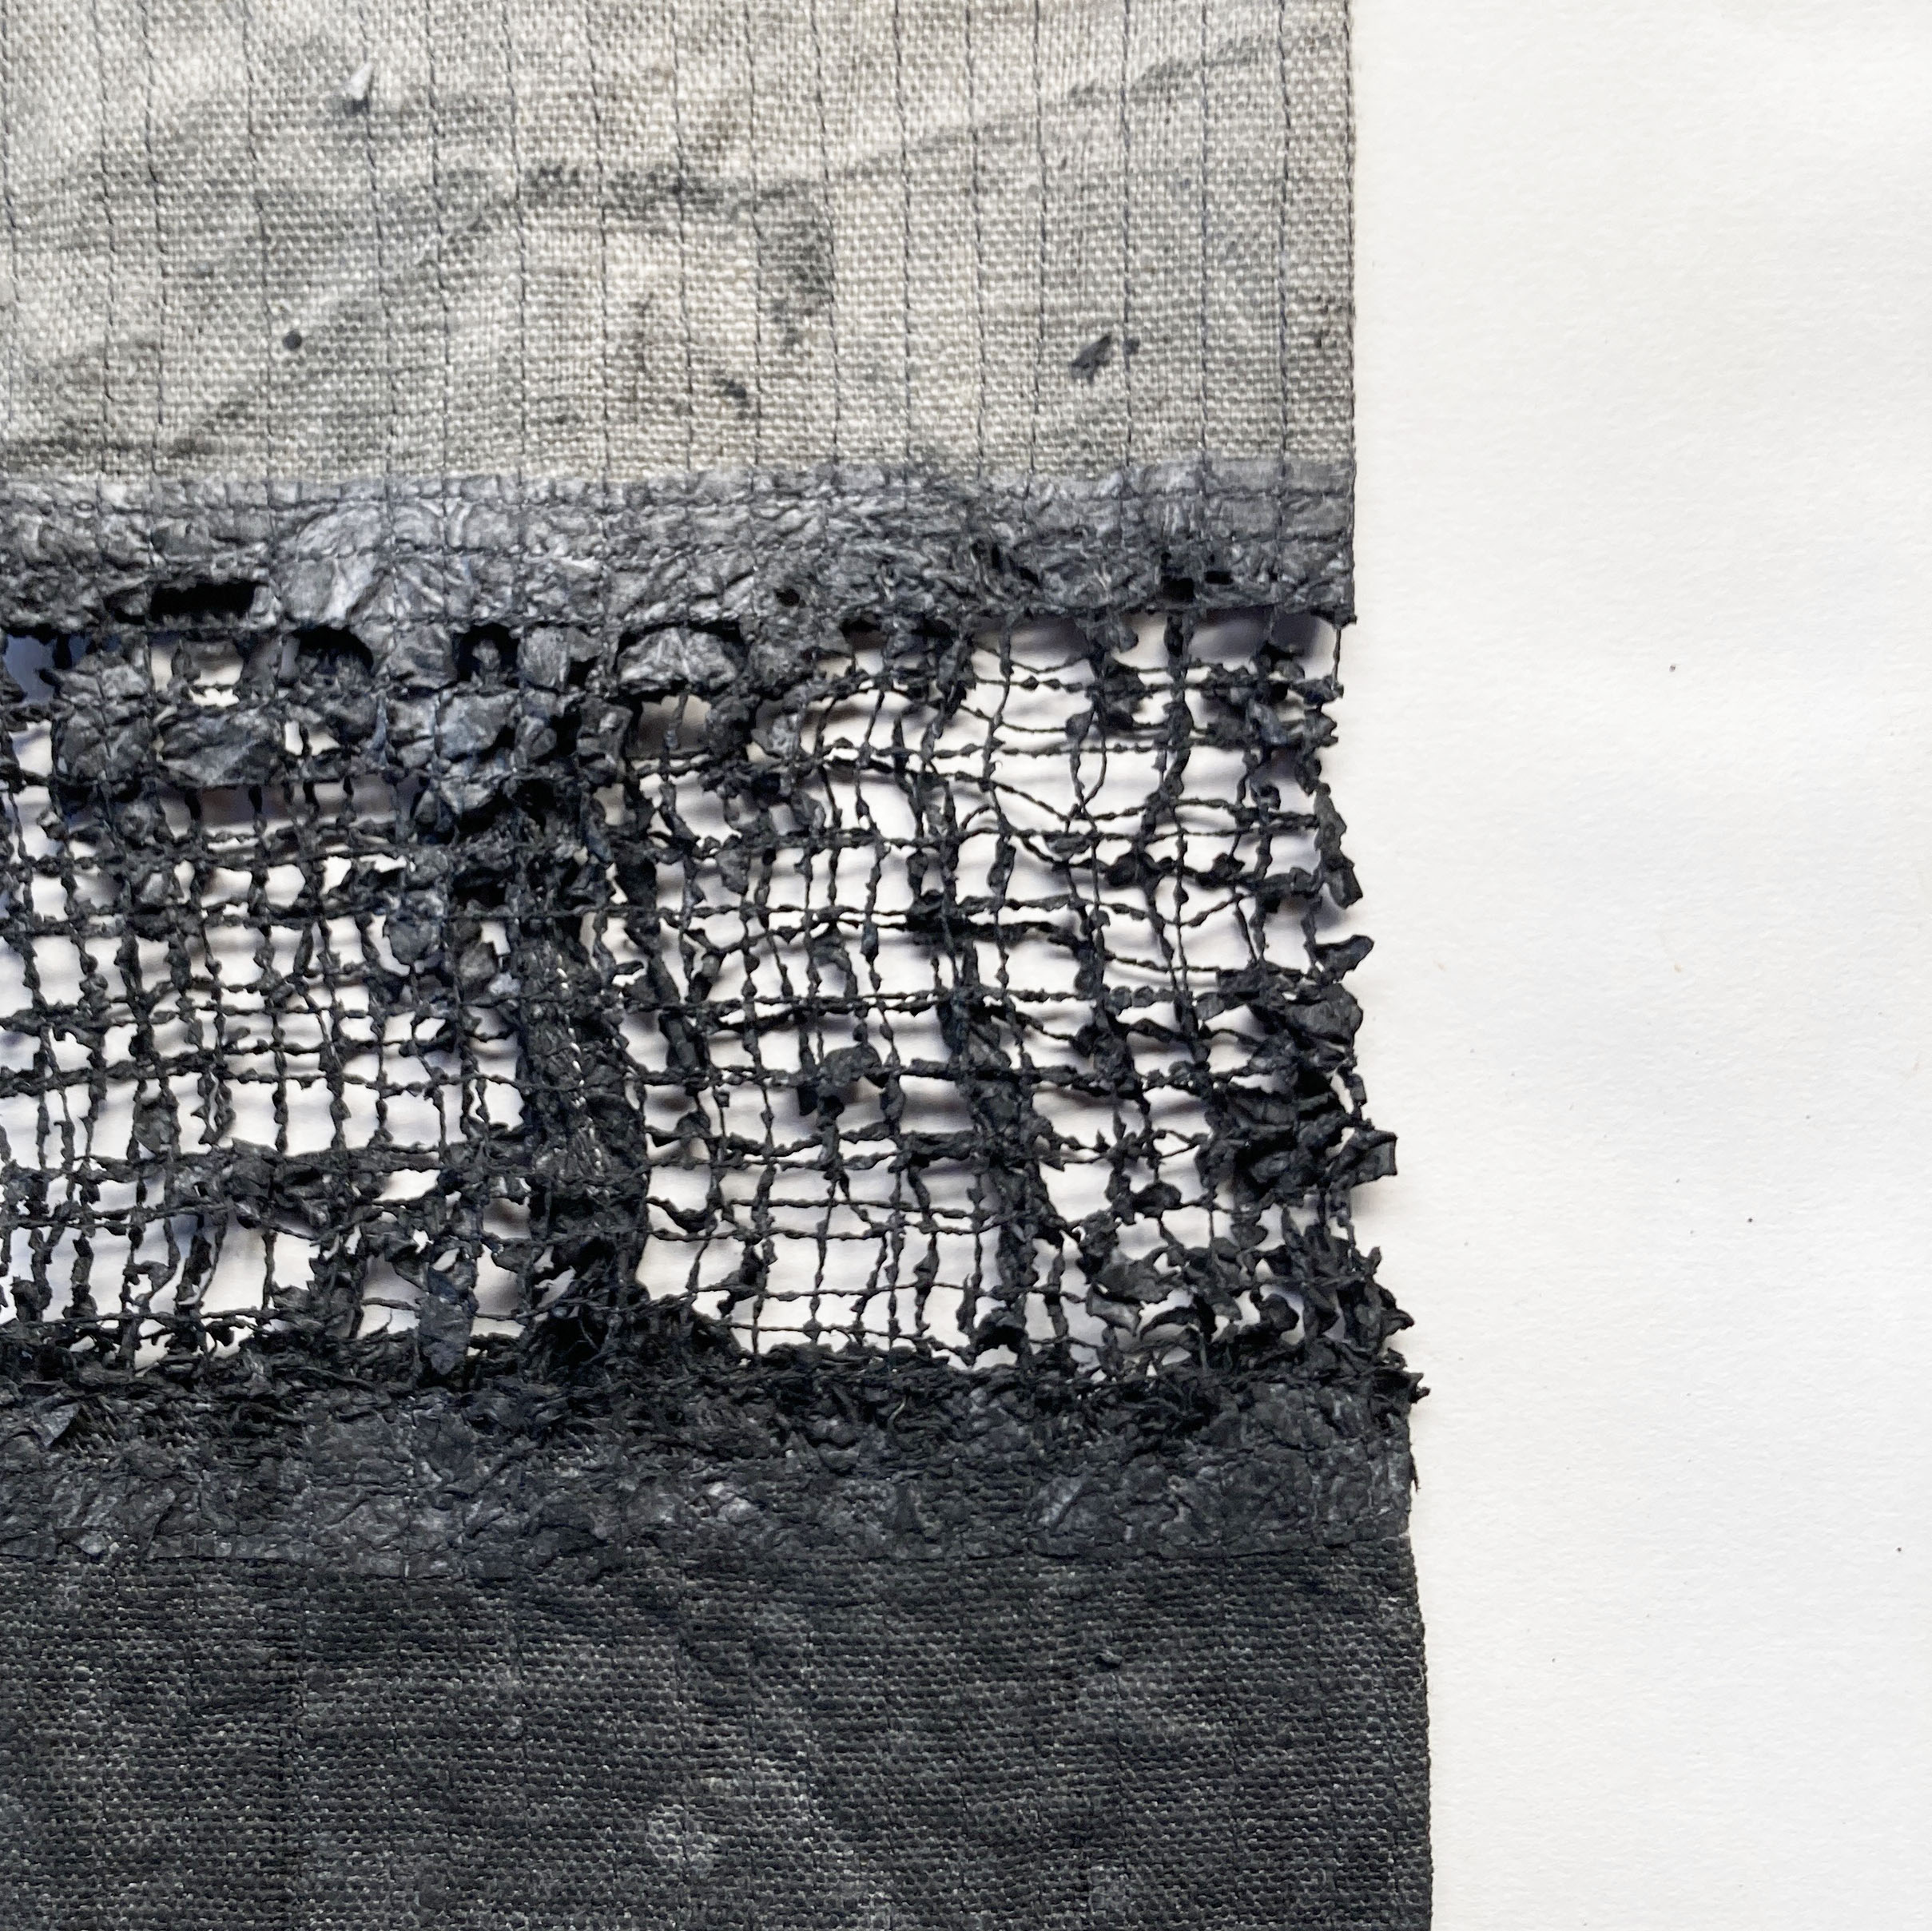
Lots of marking cloth!

You’ll be drawing and writing, bookmaking, stitching 2D and 3D works and using found objects and playing with interesting materials. I’ll be there all the way through to help and explain, both on the videos and through the dedicated interactive Facebook page where you can ask as many questions as you like.

Stitch

Through the exploration of my place here on the Norfolk coast I help you to use your creative imagination to find your own way of expressing how you experience and react to the place in which you live.

You can find more information here and sign up to reserve a place, or receive a notification when the workshop becomes available.

Sounding Place

Later in the year I will be taking part in an exhibition that focuses on the relationship between landscape and sound. In order to make new work for this exhibition I have been thinking more about my relationship to the sounds in the environment around me, specifically, how I can communicate something that is aural, in a visual manner? What it is the connection between what I hear and what I see in the landscape? And finally how that connection provides a way of visualising sound?

Apart from art, music is my other great love, and maybe you know that in another life (it seems a long time ago now) music and playing the flute was my creative impetus. Although melody and harmony are important, it is often the drive of pulse and rhythm in the music that makes me prick up my ears and listen. I find myself tapping my fingers or wiggling my toes subconsciously to its beat, and the same thing happens to the non-musical sounds I hear around me as well. So, making a connection between the aural and visual rhythms of the landscape is the focus for this new work.

The word rhythm comes from the Greek rhuthmos, a repeated, regular motion, and is also related to rhein, to flow. Musical rhythm is hard to define as there are various elements involved: metre, accent and tempo, but in its most basic form I like to think of rhythm as being a pattern of sounds, and the gaps or silences in between. In music rhythm happens over time, as do the non-musical sounds around us, and it also involves a movement forwards that could take seconds, minutes or hours.

So how can I transcribe the rhythmical values of sound visually? If I take my definition of aural rhythm and transcribe the pattern of sounds to a pattern of marks that could be lines, or shapes, or colours, and the silences as being spatial gaps between the marks, I start to have a way in. 

I’m looking out for the connection between the patterns I hear and the patterns that make up the landscape I see; the connection between how sounds change as they move forward and how shapes, lines and colours change over space; the relationship to the silences between sounds and the spaces between objects. 

The addition of contrapuntal voices or lines, and silences or empty spaces gives me the opportunity to create more complex, multi-layered works. Furthermore (although not directly relating to sound) the connection of rhythm to cyclical movement and repeating natural phenomena such as day/night, tidal movement and the seasons, gives even more scope.

The images here are of small rhythmical works, sound snatches if you like. They are not based on specific sounds but explore the relationship between looking and listening. They are small, abstract works that focus on pulse, pattern, and repetition. They have all been made with regular, repeated marks, but I am enjoying the way the cloth moves to create objects that have a remarkable amount of flow and irregular movement.

Jib

I’ve been beavering away making work, both textile and drawing, for upcoming exhibitions and Open Studios. First up is the 62 Group ‘Tailored’ exhibition which starts next month at Sunny Bank Mills, Farsley, West Yorkshire.

Jib, Linen, wire, hand-collected and hand-ground yellow ochre, linseed oil, beeswax, seawater, Approx. 235 x 50 x 75 cm.

This was a tricky brief for me as the word ‘Tailored’ immediately conjures up ideas of garment design and making. The brief also indicated that the cloth produced at the mill for suiting could be explored or any of the processes of making, spinning yarn, designing, weaving, and dyeing cloth or the pattern cutting and sewing of a garment? Non of this relates directly to my landscape-based practice and when making work for a brief it is important to me that what I make bears some relationship to what I do as well as to the brief.

Lots of thinking and turning over ideas followed, but in a moment of realisation I understood that the making and fitting of a sail to a boat has the same process as the making and fitting of a garment to a body. As the making of utilitarian cloths that evoke my coastal surroundings plays a large part in what I do, it was game on.

Many processes need to be considered when making a sail for a boat and these are listed here, taken from my statement for the Tailored exhibition.

The design of a boat’s sail is complex. It is custom-made to the purpose and size of the vessel.  A working sail has a 3-D curved surface and is made of multiple, shaped panels. It needs to be made with the appropriate shape and material to harness the power of the wind and propel the boat forwards. Depending on the rig of the boat, the sail could be triangular or rectangular, and its size is determined by its placement relative to other sails on the boat. 

A sail is attached to the hull and to the mast by attachments at its corners and edges. These take the strain and need to be reinforced. Historically a sail would be made of waterproofed or treated cotton or flax.’ 

As you can see many of the processes of choice of materials, designing, cutting, fitting and sewing are needed for both garments and sails. So I decided to make a piece that took inspiration from a sail from a small boat, a jib, that is a small triangular foresail that sits at the front (or at the bow).

This is not a fully working, made to measure, authentic sail. I wouldn’t like to see whether it would hold up in a strong wind (although I think it probably would!). Complicated calculations are needed to get the correct shape, size, and curve for a sail and I don’t have that know how – I’m only an artist after all. Instead this sail evokes those seen on small traditional boats and gives me the motivation to explore the processes of cutting, sewing, preserving, colouring and making that make up the traditional craft of sailmaking. I have particularly enjoyed thinking about the attachments and fittings – you probably already know about my eyelet obsession – and I also experimented with making other ‘fittings’ for attaching and securing.

‘Jib’ also uses a traditional waterproofing concoction of linseed oil, beeswax and locally found yellow ochre to preserve and colour the sail. I have used this technique before and it was particularly apt for this piece of work.

‘Tailored’ is on at Sunny Bank Mills, 83-85 Town St, Farsley, Pudsey, LS28 5UJ. 13 May – 2 July 2023. Open: Tuesday – Saturday 10-4pm, Sunday 12-4pm. Closed Monday

Sketchbook

Yesterday I was at the studio boiling up some oak bark that I want to bark tan some cloth with later in the week and didn’t have much else to do. So I made a little sketchbook, positioned myself in the window and waited to see what occurred.

Frankly, not much happened! It was a particularly still, grey winter day. The tide was out, there was nothing on the water and even the birds seemed to have hunkered down and didn’t seem to want to move. But with a little patience I began to notice things. A play of light, the slight movement of the water, and the birds were actually doing more than I first thought.

Mud banks are rimmed with green algae that seems startlingly bright in the flat light

I was drawing with a biro and a very soft pencil but was jumping up occasionally to go and put a wash of colour across the page. I was aiming for the washed out, watery colours that go with the soft wintery light at this time of year.

Water and sky are the same colour with an intricate pattern of land in-between

This is what I wrote at the front of the sketch book.

March.

Flat winter light.

Today the marsh looks dark. Shapes silhouetted against a pale sky. Brown, dark green, sandy ochre.

The tide is out and the water ripples gently. Flickers that reflect shadows rather than light.

Birds are feeding on the mud banks. At the moment I can see a small flock of Brent geese (white bottoms and a white necklace round their necks). An oyster catcher, a curlew that has just swept with its hollow call , a couple of low flying seagulls and a wagtail who bobs on the grass in front of me.

The East Hills are misted – there is no detail to their outline.

Everything is still with little wind.

I can hear geese burbling in the distance. Brent geese have a contented chatter. Two pink footed geese fly over. Their call is more of a spasmodic burble. Seagulls cry. They are a constant presence. There is the rumble of a plane above the low clouds.

Two redshanks skim the water. Their outstretched wings form a black and white arrow.

Small activities and movements in a seemingly motionless world.

It’s good to take time to sit and watch what’s going on. Even on an unpromising day there is something to see and hear. However, after an hour my nose was dripping and my fingers were getting too cold to hold the pen. I’d filled the sketchbook so I packed up and went home for a cup of tea.

Ebb tide

Some brief musings on the ebb tide…

The beach is recreated each time the water flows out and what wasn’t there before becomes.

Draining water sculpts the sand into beach rivers.

Wave movements are recreated on the wet surface of the beach. A brief memory of where they were.

Sand that has been pushed in by the force of the water is pulled back again to reveal different contours.

The incoming tide brings things in, and the ebbing tide reveals them.

Buried things are uncovered and can be found.

Wrack line; tide line; strand line – remains are left high and dry.

This has happened twice a day since the earth began and will continue to happen for ever more. It’s good to have this certainty.

Bark tanning (part 2)

Cutch dyed cloth with gesso underpainting

Last time I told how a visit to the Grimsay Boat Haven in the Outer Hebrides inspired me to start looking at the traditional way of preserving and protecting cloth sails using bark tanning and cutch. Today I’m going to tell you about what I have done so far.

Cutch dyed cloth with watercolour overpainting

After my Uist holiday the first thing I did when I got home was to get hold of some cutch and start experimenting. This was easier said than done. Chandleries don’t stock it anymore as no one makes their own sails out of canvas now; modern fabrics are more durable and waterproof. Even classic boat suppliers don’t supply it. Luckily George Weil came up trumps and can supply cutch in powder form – I got started. 

I’m not a dyer. Any dyeing experience I have had was from years ago and largely forgotten. Many of you will have had much more practise at it than me, however, it’s amazing how much you can learn by actually doing it and then getting some books and learning some more. Hands on experience counts.

Cutch dyed cloth with under and over painting

Starting by simply throwing cloth into a pot of dye stuff in the same spirit as the Hebridean boatbuilders, I soon found myself trying other things out: mordanting and post mordanting with alum, copper sulphate and iron water, under painting, over painting and iron wire eyelets (of course).

Cutch gives the most wonderful intense red/brown colour. Mordanting with alum brightens it even more. Splashes of acrylic paint painted onto the cloth before throwing in the dye pot references the incidental, coloured marks seen on the Grimsay sails. Over painting the cutch dyed cloths with watercolour adds yet more subtle colour reminiscent of incidental day to day wear.

Cutch dyed cloth with acrylic underpainting

Although these cutch samples have decorative marks and stitches, I am still referencing the methods and techniques seen on the Grimsay sails and other traditional boat sails: eyelets, seams, and various methods of fixing and fastening. I want these small samples to look as if they were made from fragments of old sail.

I am very happy with these samples, but being directly inspired by the Grimsay sails they are somewhat removed from my normal source of inspiration here on the North Norfolk coast. I have searched for references to bark tanning in the boat yards here in Wells, and although I have information about boat building, up to now I have found no concrete evidence about what treatments sails were given. It is more than likely that cutch would have been available in the chandleries around here, but this is just supposition at the moment. I have no actual proof – more research is needed. 

Cutch dyed cloth with PVA resist and watercolour over painting

However, what I have found out about are the materials other communities have traditionally used to treat their sails. All around the world fishermen and sailors of the past have used tannin rich plants and barks to preserve and protect their sails and ropes. In the South Pacific mangrove tree bark was used, and in Newfoundland sailors and fishermen harvested and boiled their ropes and sails in birch bark. Any tannin rich tree bark does the same job as cutch.

Oak bark tanned cloth with acrylic under painting

Unlike the Outer Hebrides where there are barely any trees from which to gather bark (hence the need, I suppose, for buying in cutch), here on the Norfolk coast we have an abundance of trees. I quickly found that there are many varieties of trees in my local surroundings to source bark for tanning cloth: oak, birch and pine, chestnut and alder.  It is important to me that my bark tanned cloth comes from local trees as it gives the work a direct connection to the place. 

After a walk in the pinewoods along the back of the beach to see what was available I decided to start with oak. It is rich in tannin (my son tells me that when working with oak his hands are stained black with the tannin from the wood) and there are many old oaks amongst the pine trees in the woods. A lot of the oaks have dead branches scattered around the base of their trunks and it is an easy matter to peel some of the bark from these fallen branches – no living trees were harmed in this bark tanning experiment.

Oak bark tanned cloth dipped in iron water

The inner skin of the oak bark is a rich brown colour and a gives a hint of the possible colour of the cloth. It has an earthy, mushroomy smell.  I started boiling it in the kitchen on top of the oven to make a sort of oak bark tea. Almost immediately my husband banned me from the house and sent me down to the studio with a little camping stove – I don’t mind the smell, but he thinks it’s rank!

The colour from oak bark is much softer than that of cutch. It’s a soft yellow/brown. Repeated dipping and boiling in the dye pot produces a deeper, richer colour. These are my preferred samples but the reason is mainly because of the connection it gives me to this place.

Oak bark dyed cloth

At the moment I am sampling. Trying things out and seeing what might have relevance. Ideas are brewing as I’m making things and I have a little buzz of excitement as something new begins to take me down a different route. 

Bark tanning (part 1)

This afternoon I am at the studio writing this whilst a pot of oak bark simmers on my little camping stove. I’ve started some new explorations and I thought I’d tell you about where I’ve got to so far. In this post I’ll tell you about why and in the next one I’ll tell you what.

In the summer we spent 2 weeks on North Uist in the Outer Hebrides. It’s a wonderful place for walking and wildlife spotting and we had a fabulous time there. North Uist is a low-lying island with low hills, peat bogs, lochs and breath-taking beaches.

It is one of a string of islands: Berneray, North Uist, Benbecula, South Uist, Eriskay, that are now connected by causeways but that were connected only by fords in the past. The local industries are crofting, fishing and tourism. There is as much water there as land.

Whilst there, we went to Grimsay, another small island just off Benbecula, and the Grimsay Boat Haven. The small museum shelters five boats built on the island by the Stewart family. As well as the boats themselves there are oral histories, photographs and other information explaining the boatbuilding and fishing industries.

Before the causeways were built boats were an essential on the Uists for getting around as well as for fishing, and most fishing and crofting families would have owned a Grimsay boat. The main fishing grounds are around the Monach Isles to the west side of the islands, but there are no harbours to the west, only windswept sandy beaches that take the full force of the Atlantic winds. All the harbours are on the sheltered, but rocky east side. The boats needed to be quick and small to get through the fords between the Uists and Benbecula and seaworthy enough to manage the open seas on the other side.

I loved the boats, and with a son who is a trained boatbuilder I am doubly interested. But it was the old sails that caught my interest as they were dyed with cutch (Cartadh in Gaelic) to preserve them from the effects of the weather. Cutch comes from the heartwood of the Acacia Catechu tree which grows in East Asia, India and other parts of Asia. It would have been supplied as a dye extract in boat chandleries in either powder or liquid form. It is a natural preservative that contains tannin. By tanning sails with cutch it prevents them from taking on too much water, protected them from mildew and rotting and gives them the red/brown colour seen on many traditional sailing boats.

The information board in the Boat Haven gave me some information.

‘Cartadh/Cutch was used to preserve sails and ropes. A fire was lit below a big tub of water. The cutch extract was placed in the hot water, stirred up and then a bundle of rope was added and left for 20 minutes. The rope was then hung on a piece of corrugated tin and left to drip back into the tub for another 20 minutes. It was the same procedure with the sails.’

Calum ‘Cubby’ Mackinnon, Cnoc Cuidhein formerly Jura

The sails on display were mostly made and repaired at home by the fishermen or by their wives. Stitching canvas is hard work and they would have used a sail makers needle and sailmakers palm, a leather pad that was worn in the palm of the hand to help push the needle through the canvas.

Of course, I spent quite a time inspecting the stitching and the eyelets! But the thing that caught my eye was the way in which the colour had faded from the canvas, or conversely, the canvas had taken up colour from elsewhere. The sails appeared to be unevenly tanned, although that could have been the effect of the water and the weather.

You may remember that I have made many pieces of work derived from the technique of ‘dressing’ sails with linseed oil and wax to waterproof and preserve them, and I have had the idea of bark tanning in my mind for quite a while now. The encounter at the Grimsay Boat Haven re-sparked my interest and has set me off down a new line of enquiry.

Next time I’ll show you some of my cutch experiments and further bark tanning exploits.

Flood warning

Yesterday evening I received a flood alert from the Environment Agency warning that flooding was possible in Wells due to a big tide and other environmental conditions. So, this morning I’ve come down to the studio early to check that everything is ok. I didn’t bother to put up the flood gates last night, even though the flood alert was upgraded to a flood warning, because the Environment Agency advice was for a peak of 3.91m. I don’t normally worry unless is reaches over 4.1m.

Today there’s a northerly wind and in certain circumstances a strong north wind can push the tide further in than normal (hence the flood warning), so it is worth just coming out to make sure everything is alright. At the moment, the north wind is calm, about 10 knots, there are a few clouds in the sky and sun, and it’s quite chilly. Autumn has definitely arrived.

It’s about 40 minutes before high tide and the water is rushing in (the sea moves in or out the most an hour before and after high or low tide). The surface of the water is disturbed rather than wavy. Small eddies ripple at the back end of boats and buoys as the flow of water is broken. Just in front of me small whirlpools erupt as the water passes a jutting brick wall and a piece of bladderwrack gets caught in a current and whirls round. Foam on the surface of the water marks the pace of the incoming tide, and it’s moving fast.

20 minutes before high tide and the water hasn’t reached the top of the quay wall just outside the studio. It may just top it – but I doubt it. Luckily the studio is raised about 1m above the lip of the wall so it would have to be a huge surge to inundate it. The last time that happened was in 2013 and there is a mark on the wall to show where the tide reached on that day. It is about 1.75m above where the water is today. 

Further along the quay the flood gate has been rolled across the road as a precaution, and water has topped the quay covering the carpark with a slow seep rather than a rush.

Here, there is a continuous splashing, slapping, and gurgling as water hits the wall. It is a benign sound and if I close my eyes, it is soothing rather than threatening. 

There is no worry here today and as it is now past the peak of the tide, I make my way home for a cup of tea. 

Saltbags

Recently I put up an Instagram post of this piece of work, and somebody asked, ‘What do you do with these Saltbags?’. I thought it was a very good question and I answered, ‘I suppose that like any artwork they will sit there posing questions and making one think.’

 I thought I would try to explain my thoughts behind these two little works more fully.

Two Saltbags,  Linen, wire, chalk, yellow ochre, salt, 14 x 9 x 4.5 cm 

First, I am not trying to realistically represent the landscape that inspires me, but instead try to find ways of evoking it using other forms, shapes or materials. The form I have used here comes from the traditional shape of the sandbag weight at the end of a heaving line – a lightweight rope that can be easily thrown between boats, or from boat to quay, onto which a heavier rope can be attached. It is small enough to fit into the hand to throw but heavy enough to have some heft behind it so that the lightweight rope attached to it will travel the distance required.

Usually, the weight would have been filled with sand, but I have changed the filling and used chalk and salt in one bag, and an ochreous clay and salt in the other. I collected the chalk and clay locally and the materials form a direct connection to the environment. The salt comes from the supermarket, but of course there is a direct corelation between salt, the sea, and this landscape.

Salt is a material I have used in my work quite a bit and is a material I use to explore changes in the environment and the passing of time. I use salt mainly by soaking stitched works in a salt solution that I have made up myself (actual seawater is only 3½% salt and not salty enough for the processes I use), and as the water evaporates both the stitched work and the salt changes character.

This process is cyclical, and it takes time. When salt is mixed with water it dissolves. As the water slowly evaporates in the air the salt’s crystalline structure is revealed. If the salt crystals get wet or are left in a damp environment, they return to their original form. It can take up to 2 months for the saltwater to evaporate depending on the outside temperature and the amount of water in the salt bath.

The other quality I exploit is salt’s corrosiveness. If you’ve ever been to the coast, you will know how the salt air and water gets into everything and then the rot sets in. I often sew iron rings into my work and within days they start to rust as the saltwater attacks the metal; the first signs of change in the piece. 

As the work dries out completely the salt crystals become stable and remarkably solid and strong, but with the faintest hint of moisture the salt crystals start to degenerate, and with this breaking down the metal and cloth also start to disintegrate. In a damp environment the work starts to fragment and break up and after a period of time, falls apart.

It is the common state for all things to tend from order to disorder – to break down and collapse. Another word, used in physics, for disorder or decay is entropy. Entropy explains why, left to the mercy of the elements, ice melts, glass shatters and salt dissolves.

Professor Brian Cox explains in the television programme Wonders of the Universe that in the wind a sandcastle will always be blown from order into disorder (low entropy to high entropy) and never the other way round (a pile of sand is never blown into the order of a sandcastle). He also explains that this is why time passes from the past to the future. Watch it here – it is a complicated subject and he explains it much better than me!

As Brian Cox says,

‘as each moment passes, things change, and once these changes have happened, they are never undone. Permanent change is a fundamental part of what it means to be human. We all age as the years pass by — people are born, they live, and they die. I suppose it’s part of the joy and tragedy of our lives, but out there in the universe, those grand and epic cycles appear eternal and unchanging. But that’s an illusion. See, in the life of the universe, just as in our lives, everything is irreversibly changing.’

So, when you look at these two little salt filled bags, I am presenting you with ideas of life, change, decay, and the time that has passed for all of that to happen.

Sketchbook

After a frantic few months I now have a few weeks of holiday and relaxation!

This morning we went out on the boat and I was dropped off at the beach with my sketchbook for an hour or so of sitting, looking and drawing.

One of my activities when I can’t settle to anything is to make small, 16 page sketchbooks, so I grabbed one of these along with a fineliner and a soft pencil before going out.

I never know what will catch my eye, but this is what interested me today.

In page order:

Windy, N.W. – flag on the lifeboat station at full stretch

Sunny – 1/8 cloud cover

A chill in the air

Enough wind for it to be challenging in Pickle (the boat) – difficult launch off the East Hills against the wind.

Sea – petrol blue

Sky – cerulean

1 hour before high tide and the water is coming in slowly.

Marsh flies

Lazy ripples onshore

Points of Sail

Tacking out toward the bar

Reefed, but still moving fast

The wind frets the surface of the water

Larger ripples from waves

Smaller textures from wind

Clouds are building on the horizon

Cumulus

Hornwrack and hand

Shadow drawings

Onshore wind

Sail down

Motor on

After high tide the wind has dropped and now the sun feels hot.